How to use still.synth in Ableton Live
Plug-ins on, still.synth on a MIDI track, chords, bass and drums in Live’s tempo — and your takes dropped straight onto Live’s tracks.
In Live’s Settings → Plug-Ins, switch on VST3. Then find still.synth under Plug-Ins in the browser and double-click it to load it on a MIDI track. Hold a root and a shape pad to play, press Play in Live for the drums, and drag a recorded take from still.synth onto Live: MIDI becomes one track per instrument, WAV an audio track.
-
Install still.synth
Run the installer from your download page. It puts the VST3 and AU plugins and the Standalone app in place. On a Mac, use the latest version — older Mac builds don’t load in Live.
-
Turn on VST3 plug-ins in Live
Open Live → Settings → Plug-Ins and switch on Use VST3 Plug-In System Folders. Live scans your plug-ins and still.synth appears in the browser.
Got hundreds of plug-ins and only want this one? Leave the system folders off, switch on Use VST3 Plug-In Custom Folder and point it at a folder that holds just
still.synth Instrument.vst3(an alias of the one in/Library/Audio/Plug-Ins/VST3works).Live also needs a sound card: Settings → Audio → Audio Output Device must not be “No Device”.
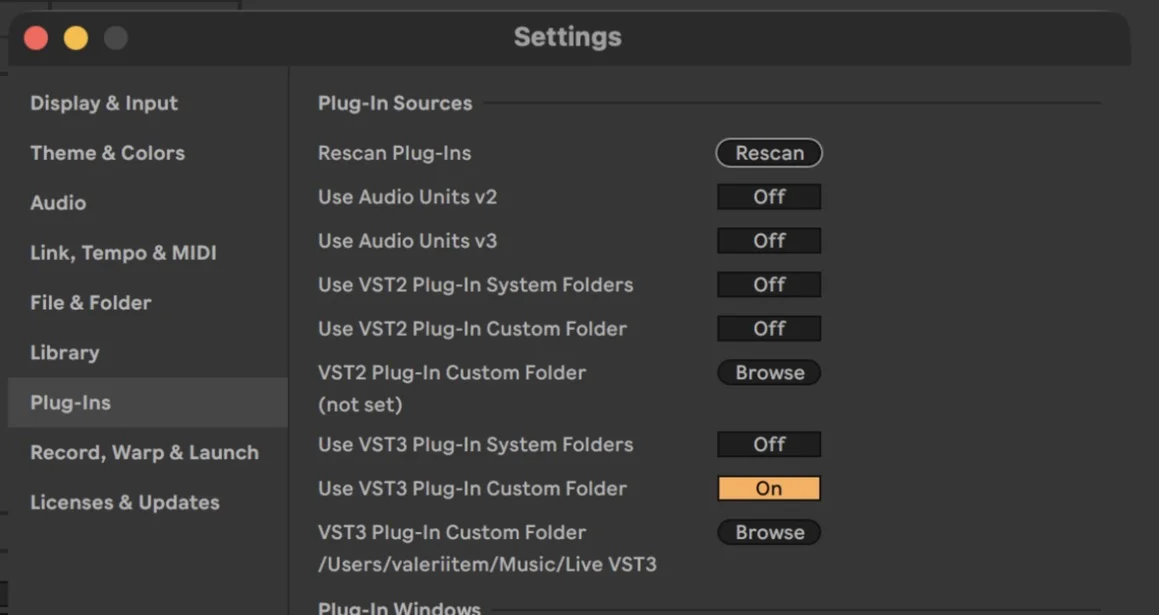
Live’s Settings → Plug-Ins with VST3 plug-ins switched on -
Load still.synth on a MIDI track
In the browser, click Plug-Ins, open the still.synth folder and double-click still.synth Instrument — it loads on the selected MIDI track. You can also drag it onto any MIDI track. still.synth is a plug-in, so it’s listed under Plug-Ins rather than Live’s own Instruments.
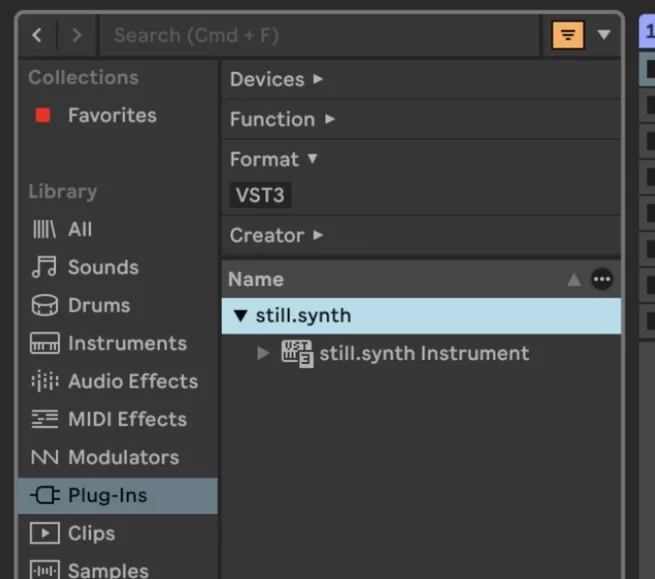
Live’s browser: Plug-Ins → still.synth → still.synth Instrument -
Open its window
The device shows up at the bottom of the screen. Click the wrench icon in its title bar (Show/Hide Plug-In Window) to open the still.synth window. Selecting the track arms it for your MIDI keyboard (Monitor: Auto).
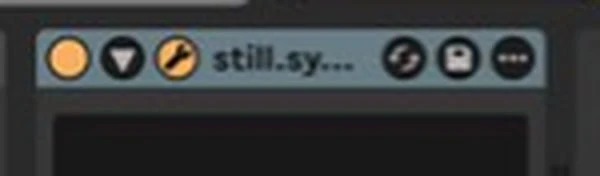
The still.synth device in Live: the wrench icon (third from the left) opens its window -
Play
Hold a root on your keyboard and press a chord-shape pad — Dim, Maj, Min, Sus, 6, m7, M7 or 9. Out of the box the shape pads answer notes 96–103 on channel 10; Learn Pad in still.synth’s Settings → Mapping puts them on your controller’s pads. Press Play in Live and the drums and arpeggios lock to Live’s tempo.
-
Record a take and drop it into Live
Press the ↓ key next to the looper to record a take, and again to stop. The WAV and MIDI lanes at the bottom of the Play tab fill in as you play.
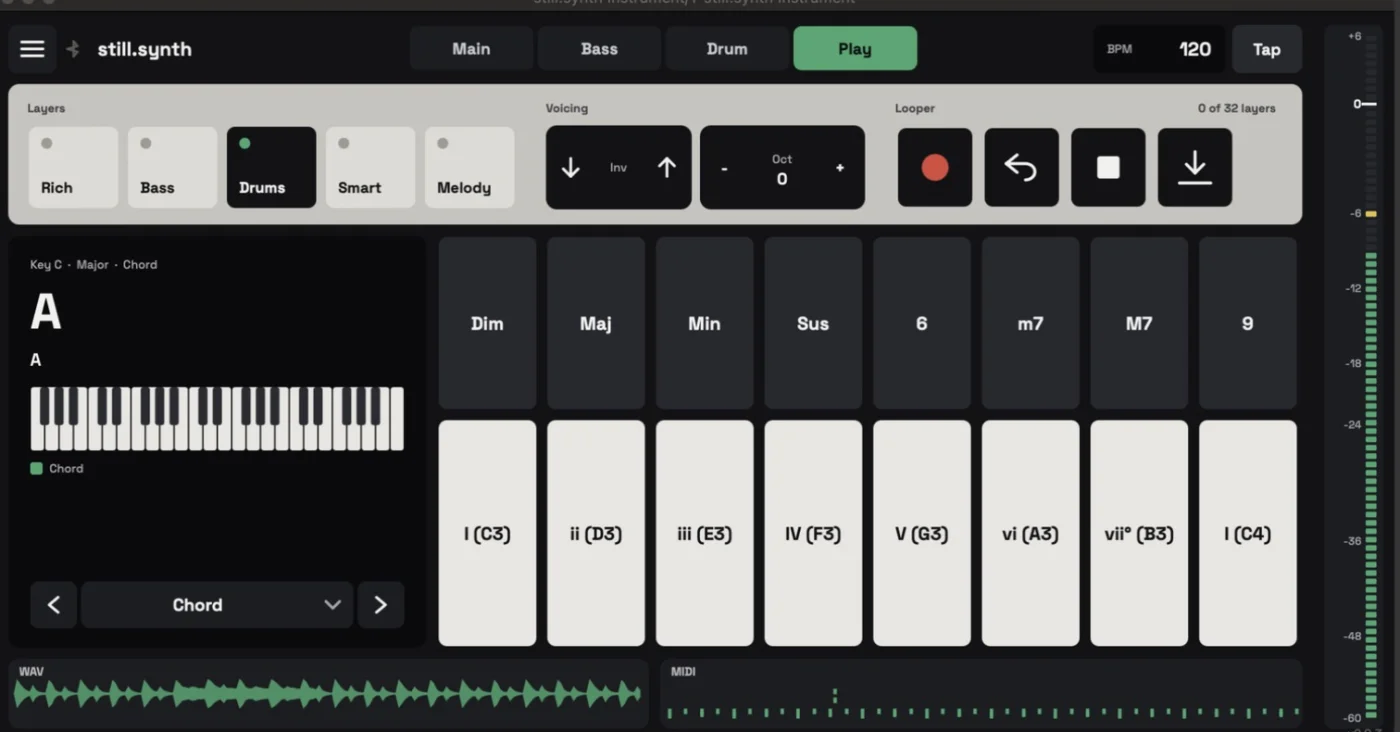
A take in still.synth: the WAV lane shows the waveform, the MIDI lane the notes -
Get it onto Live’s tracks
Drag the MIDI lane onto the empty area of the Session or Arrangement view: Live creates one MIDI track per instrument — Drums, Main: <synth preset>, Bass: <bass preset> — ready for your own instruments. Drag the WAV lane the same way for the whole mix on an audio track.

Dropped into Live: the Drums and Main MIDI tracks, and the take as an audio track (007)
If something’s off
still.synth isn’t in the Plug-Ins list.
Check that VST3 is switched on in Settings → Plug-Ins and press Rescan, and that an Audio Output Device is chosen. On a Mac, update to the latest still.synth — Live refuses the VST3 from older Mac versions.
I play my keyboard and hear nothing.
Select the still.synth track so it’s armed (Monitor: Auto), check that your keyboard is enabled under Settings → Link, Tempo & MIDI, and remember a chord needs a shape pad held with the root.
Play it before you buy it
The home page has a live version of the chord pads — tap a shape and a root and listen.