How to use still.synth in FL Studio
Scan it once, add it to the Channel rack, then play chords, bass and drums — or write them in the Piano roll and drop finished takes into your project.
In FL Studio, open Options → Manage plugins and click Find installed plugins. Then click + at the bottom of the Channel rack, choose More plugins…, type “still” and double-click still.synth Instrument. Hold a root and a shape pad to play. In the Piano roll, shape pads are notes C8–G8 set to note color 10, which FL sends on MIDI channel 10.
-
Install still.synth
Run the installer from your download page. It puts the VST3 plugin (and the AU on a Mac) in the standard plug-in folders, where FL Studio looks for them.
-
Let FL Studio find it
FL Studio only lists a new plug-in after a scan. Open Options → Manage plugins and click Find installed plugins. Type still in the Find box at the bottom: still.synth Instrument shows up as VST3 (and AU on a Mac). Click the star next to the VST3 to mark it as a favourite: from the next time FL starts, still.synth is listed right in the Channel rack’s + menu.
Got hundreds of plug-ins? Switch off Verify plugins before you scan. FL then just lists the plug-in files instead of opening each one, and the scan takes seconds instead of a coffee break.

FL Studio’s Plugin Manager filtered to still.synth: the VST3 starred, Verify plugins switched off -
Add it to the Channel rack
Click + at the bottom of the Channel rack. If you starred still.synth and restarted FL, pick still.synth Instrument near the top of the menu. Otherwise choose More plugins…, type still in Find and double-click still.synth Instrument (VST3).

FL Studio’s Select generator plugin list filtered to still.synth Instrument -
Open its window
still.synth gets its own channel in the rack and its window opens. Click the channel’s name any time to open or close the window. The Main tab holds the synth preset, key, scale, play mode and mix.
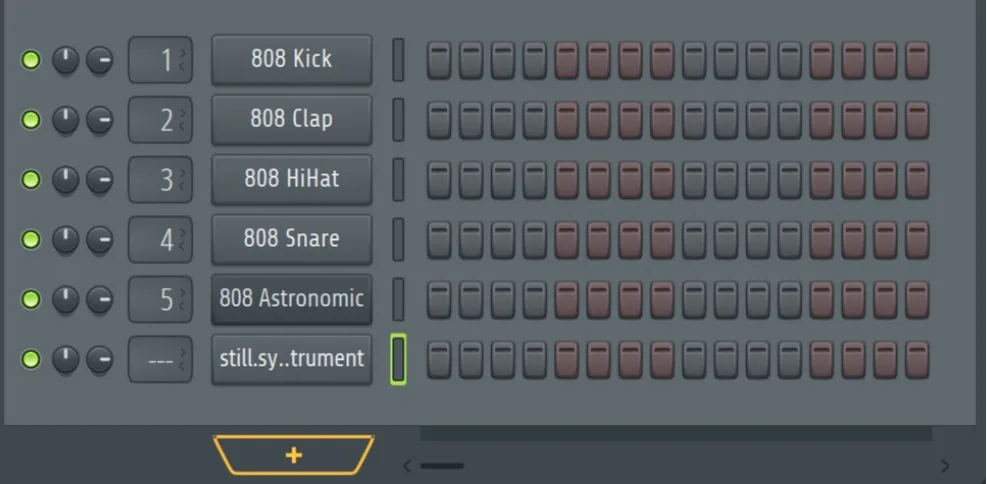
The Channel rack with a still.synth channel under FL’s default 808 kit -
Play
Hold a root on your MIDI keyboard and press a chord-shape pad — Dim, Maj, Min, Sus, 6, m7, M7 or 9. Out of the box the shape pads answer notes 96–103 on channel 10. FL passes your controller’s MIDI channel straight to the plug-in (MIDI channel through is on for every channel by default), so pads that send on channel 10 just work. To use other pads, press Learn Pad in still.synth’s Settings → Mapping and hit your first pad. Press Play in FL and the drums and arpeggios follow FL’s tempo.
No controller? Click the still.synth window and use the computer keyboard: hold 1–8 for a shape and press D F G H J K L ; for the roots — 6 + F plays Dm7 in C major.
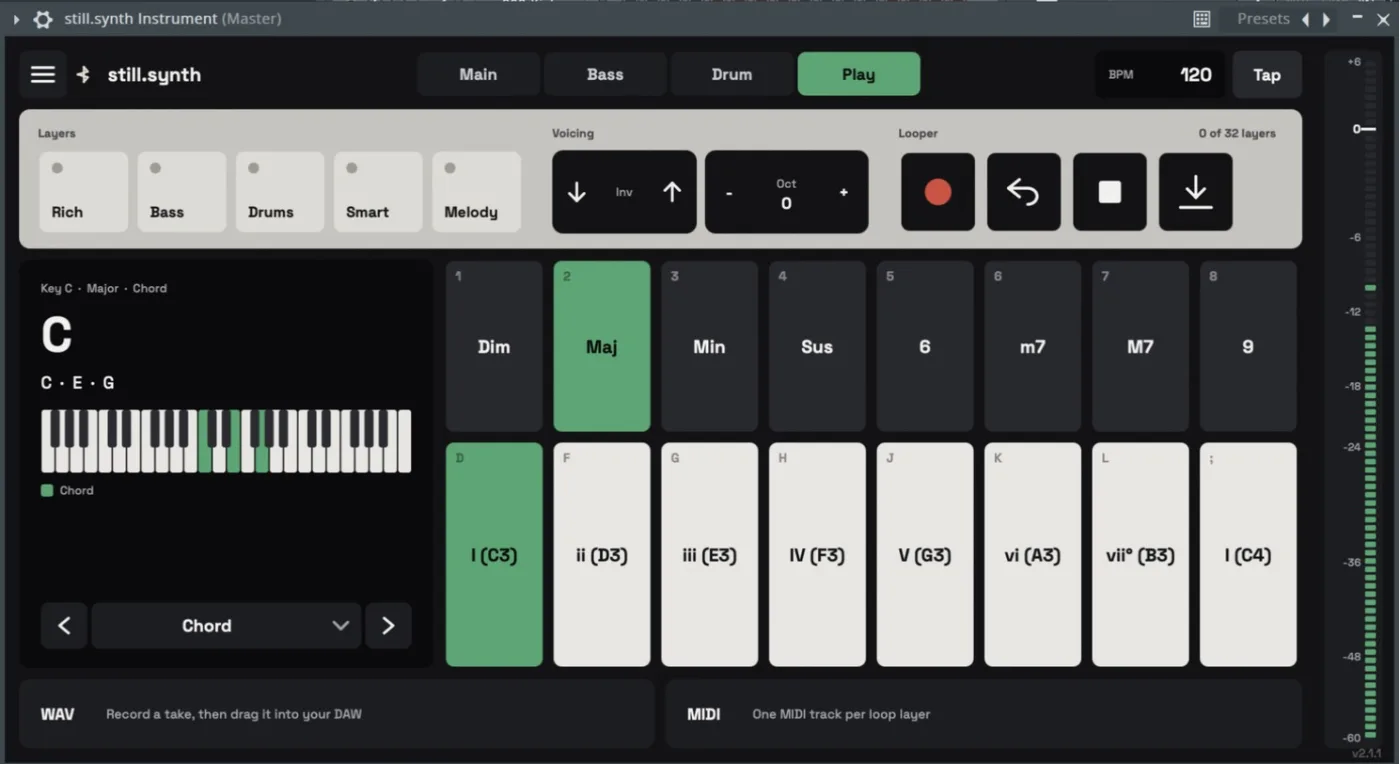
still.synth playing C major in FL Studio: the Maj shape pad and the I root lit -
Write chords in the Piano roll
Right-click the still.synth channel and choose Piano roll. Roots are ordinary notes: C5 in FL’s naming is the I (C3) pad. The shape pads sit at the top: C8 = Dim, C#8 = Maj, D8 = Min, D#8 = Sus, E8 = 6, F8 = m7, F#8 = M7, G8 = 9.
FL sends Piano roll notes on MIDI channel 1, and on channel 1 a C#8 is just a very high root. Give each shape note channel 10: double-click the note and set Color to 10 — for plug-ins, FL’s note color is the MIDI channel. Then a C#8 in color 10 over a C5 plays a C major chord.
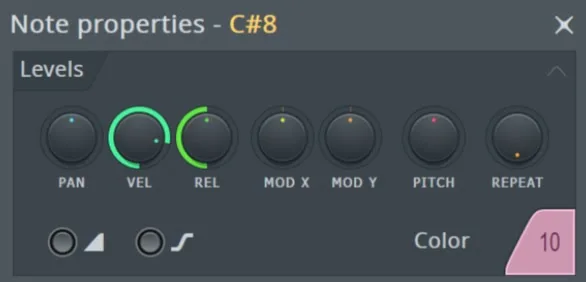
FL Studio’s Note properties for a C#8 note with Color set to 10 -
Record a take
Press the ↓ key next to the looper to record a take, and again to stop. The WAV and MIDI lanes at the bottom of the Play tab fill in as you play.
-
Drop the WAV into the Playlist
Drag the WAV lane onto the Playlist: FL drops the whole mix there as an audio clip.
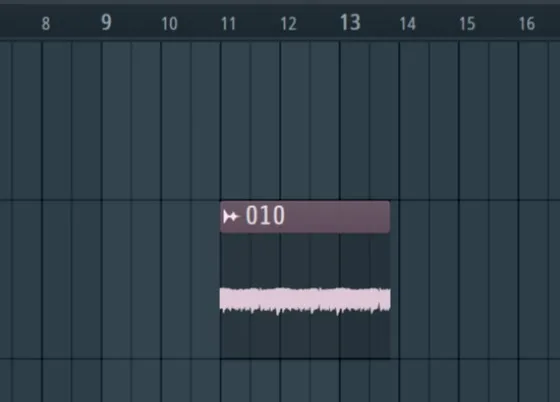
A still.synth take dropped onto FL Studio’s Playlist as an audio clip -
Drop the MIDI onto your own instrument
Add the instrument you want the part on (FL Keys, for example) and open its Piano roll. Drag the MIDI lane into it. FL asks which tracks to import: pick one part — Drums or Main: <synth preset> — and click Accept.
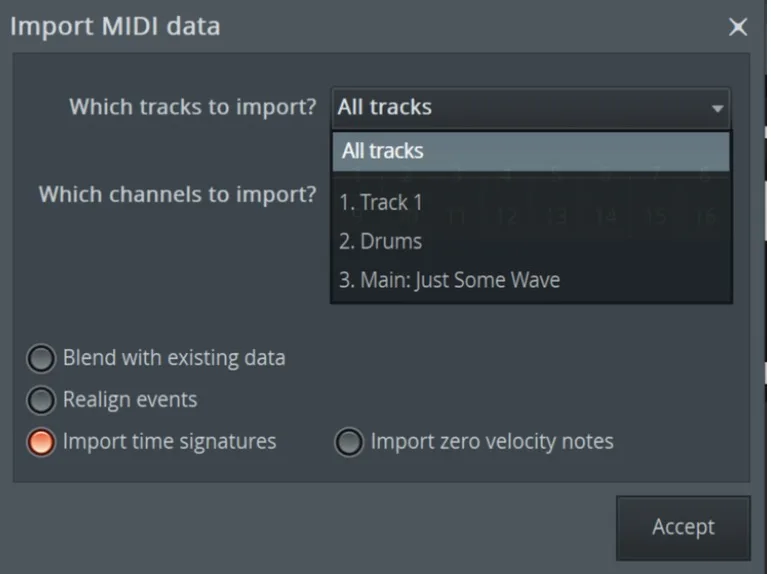
FL Studio’s Import MIDI data dialog listing the Drums and Main tracks of a still.synth take -
The notes land on that channel
The part’s notes appear in that instrument’s Piano roll, ready to edit. Repeat for the other parts, each on its own channel. Don’t drop the MIDI onto the Channel rack itself: FL treats that as opening a new project and asks to close the one you have.
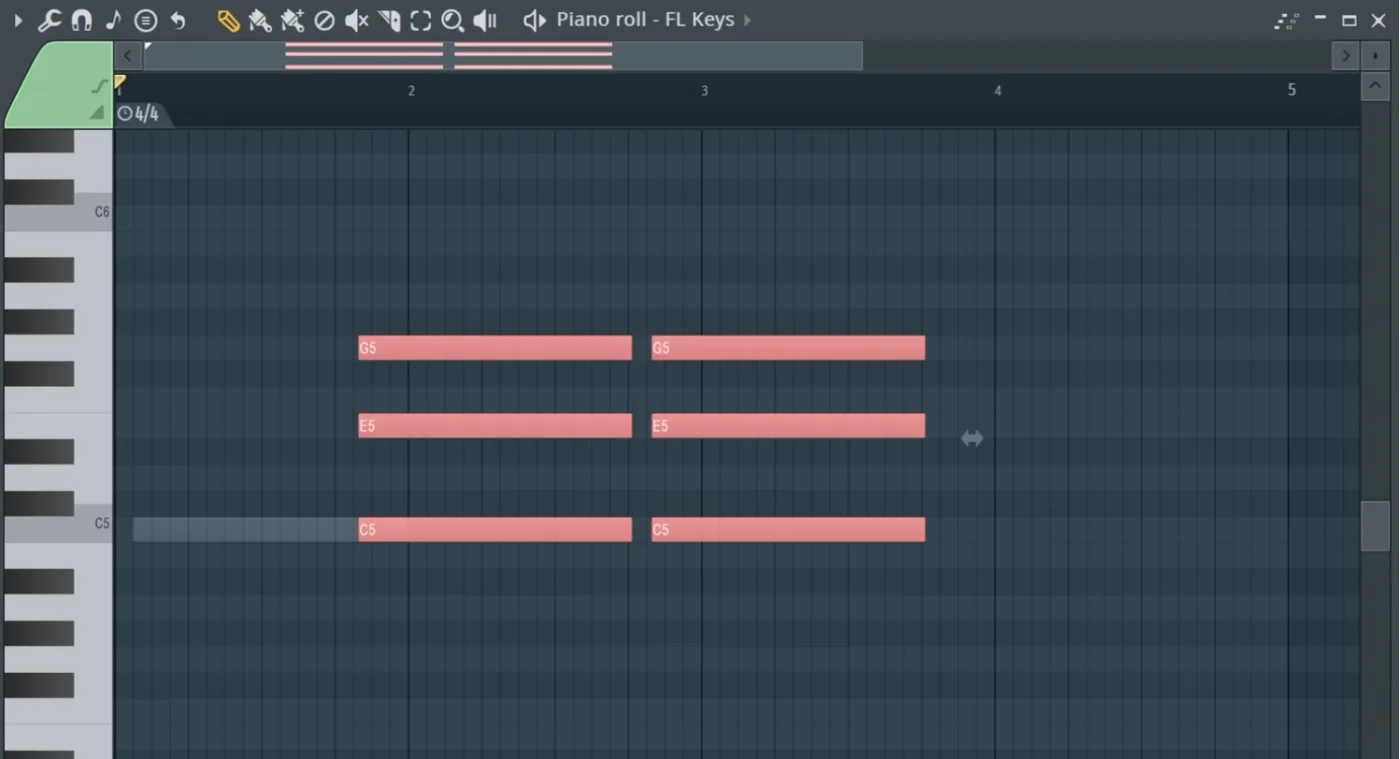
The Main part of a still.synth take imported into the FL Keys Piano roll: C major chords
If something’s off
still.synth isn’t in the + menu of the Channel rack.
Star it in Options → Manage plugins and restart FL, or choose More plugins… at the top of the menu. If still.synth isn’t there either, open Options → Manage plugins and click Find installed plugins.
The plug-in scan takes forever.
Switch off Verify plugins in Options → Manage plugins and scan again. FL lists the plug-in files without opening each one, which takes seconds even with hundreds of plug-ins.
Shape notes in the Piano roll play as high roots.
FL sends Piano roll notes on MIDI channel 1. Double-click each shape note (C8–G8) and set its Color to 10, so it goes out on channel 10 where still.synth listens for shapes.
Dropping the MIDI asked me to save and close my project.
That happens when the MIDI lands on the Channel rack. Click Cancel and drop it into an instrument’s Piano roll instead.
Play it before you buy it
The home page has a live version of the chord pads — tap a shape and a root and listen.