How to use still.synth in REAPER
One menu command puts still.synth on its own armed track — then chords, bass and drums in REAPER’s tempo, and takes dropped straight into the arrange view.
Choose Insert → Virtual instrument on new track, type “still” and pick VST3i: still.synth Instrument. The new track is already armed for your keyboard. Hold a root and a shape pad to play, press Play for the drums, and drag a recorded take into the arrange view — tick “Expand MIDI tracks to new REAPER tracks” to get one track per instrument.
-
Install still.synth
Run the installer from your download page. REAPER finds the VST3 and AU versions in the standard plug-in folders on its own.
-
Insert it on a new track
Choose Insert → Virtual instrument on new track…, type still in the filter and double-click VST3i: still.synth Instrument (the AUi version works the same on a Mac).
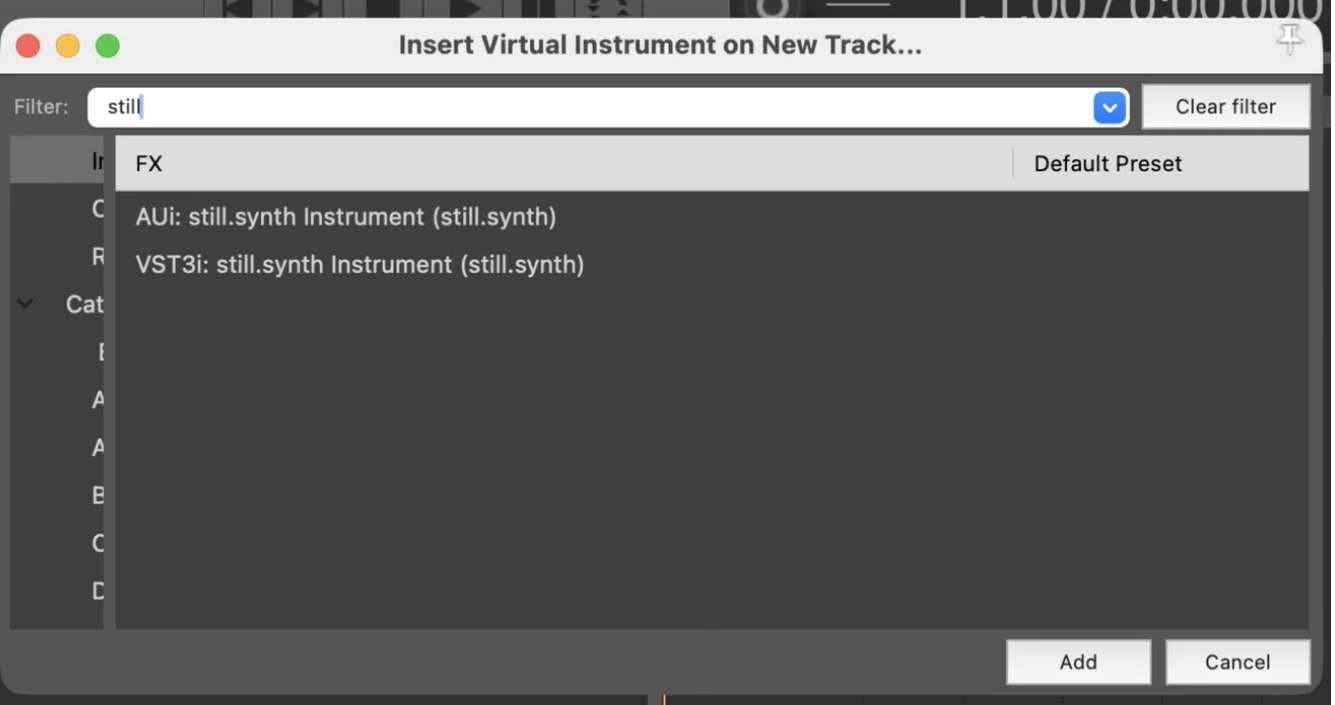
REAPER’s Insert Virtual Instrument dialog filtered to still.synth -
Open its window
still.synth opens in the track’s FX window. The new track is record-armed with monitoring on and listens to all MIDI inputs, so your keyboard plays it straight away. Click the track’s FX button any time to bring the window back.
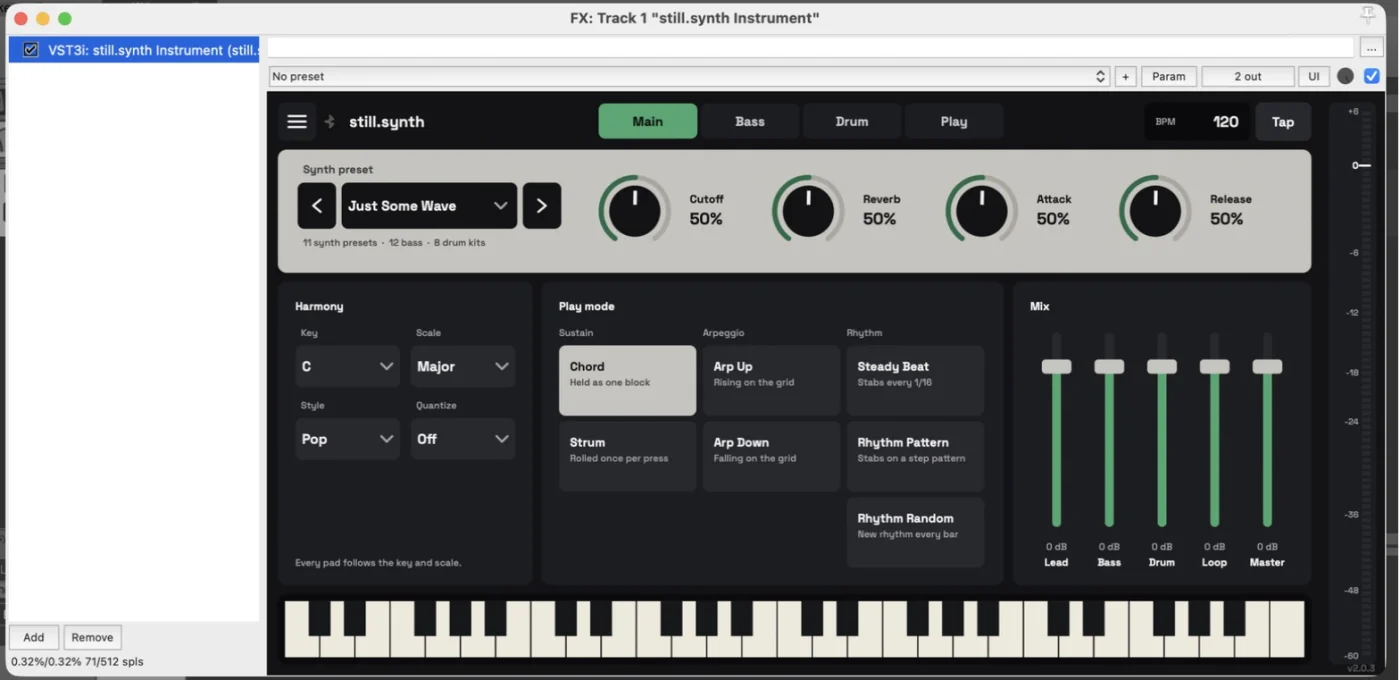
still.synth in REAPER’s FX window -
Play
Hold a root on your keyboard and press a chord-shape pad — Dim, Maj, Min, Sus, 6, m7, M7 or 9. Out of the box the shape pads answer notes 96–103 on channel 10; Learn Pad in still.synth’s Settings → Mapping puts them on your controller’s pads. Press Play (space bar) and the drums and arpeggios follow REAPER’s tempo.
-
Record a take
Press the ↓ key next to the looper to record a take, and again to stop. The WAV and MIDI lanes at the bottom of the Play tab fill in as you play.
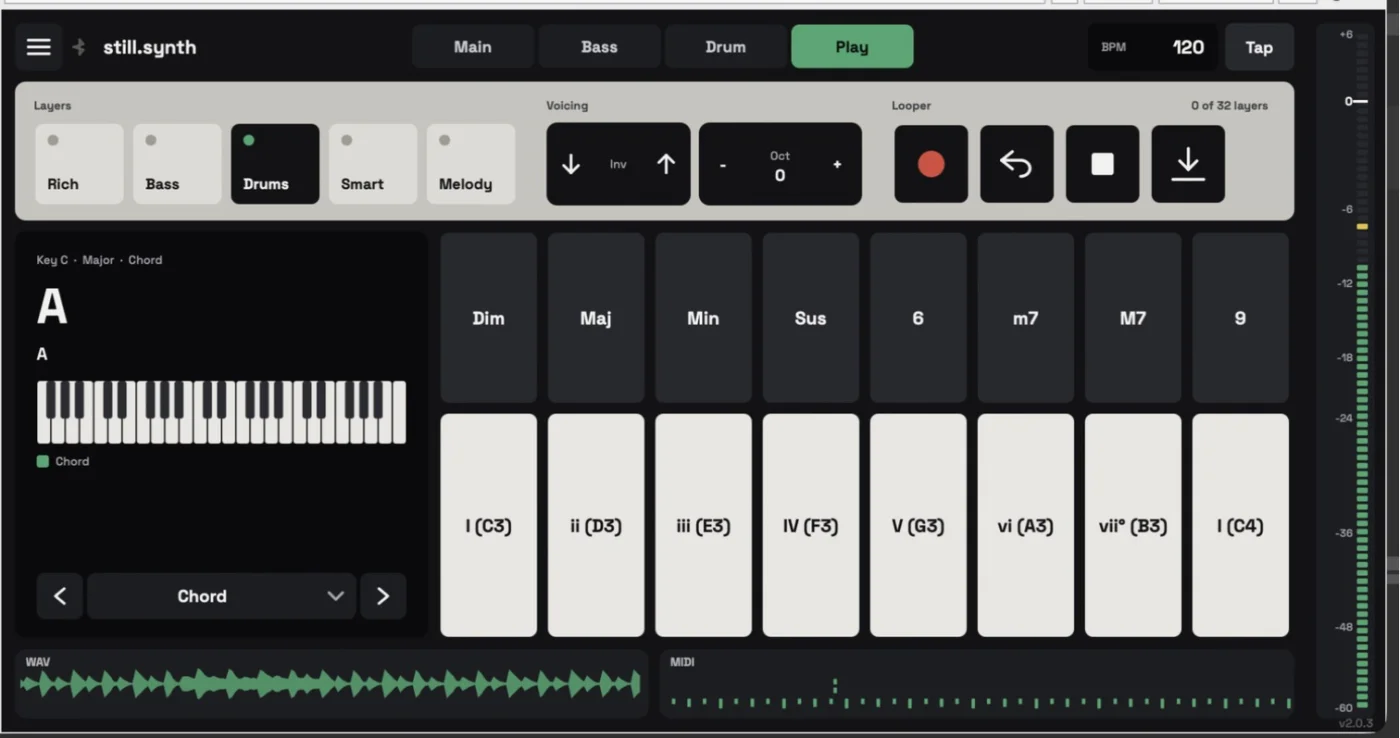
A take in still.synth inside REAPER: waveform in the WAV lane, notes in the MIDI lane -
Drop the MIDI into REAPER
Drag the MIDI lane into the arrange view. REAPER asks how to import it: tick Expand MIDI tracks to new REAPER tracks and click OK.
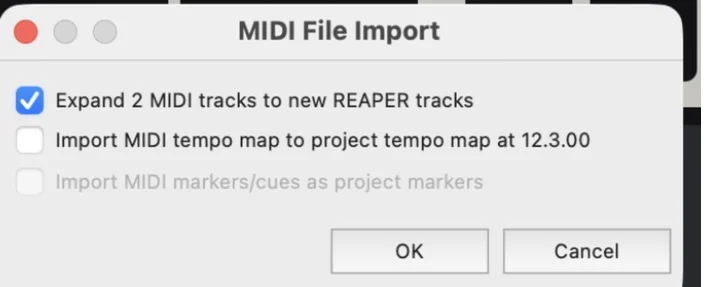
REAPER’s MIDI File Import dialog with Expand MIDI tracks ticked -
One track per instrument
You get a track per part — Drums, Main: <synth preset>, Bass: <bass preset> — ready for your own instruments. Drag the WAV lane the same way for the whole mix on an audio track.

In REAPER: the Drums and Main MIDI tracks from the take, and the WAV as an audio track
If something’s off
still.synth isn’t in the list.
Open Options → Preferences → Plug-ins → VST, check that the VST3 path includes /Library/Audio/Plug-Ins/VST3 and click Re-scan.
I play my keyboard and hear nothing.
Check that the track is record-armed with monitoring on and its input set to MIDI (All inputs), and remember a chord needs a shape pad held with the root.
Play it before you buy it
The home page has a live version of the chord pads — tap a shape and a root and listen.