still.synth: the complete guide
Everything the instrument does — playing, layers, the tabs, the looper, recording and export, controllers — on one page.
How a chord is played
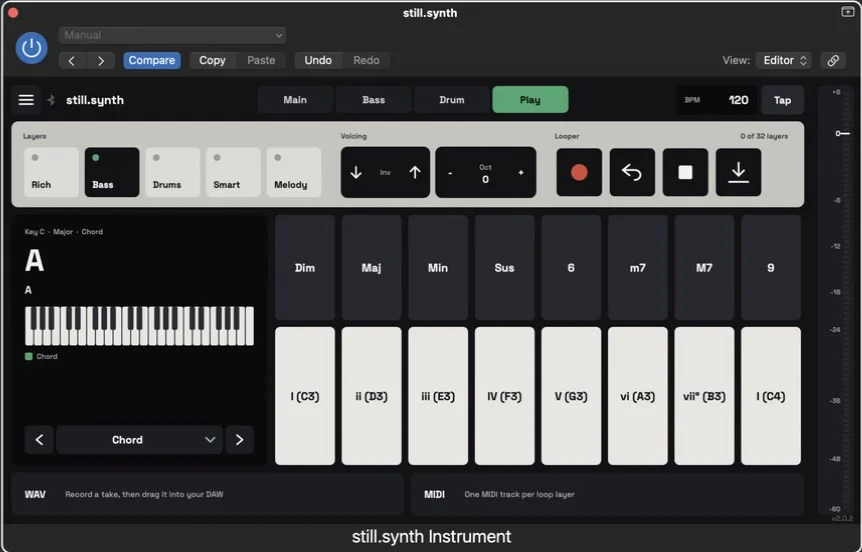
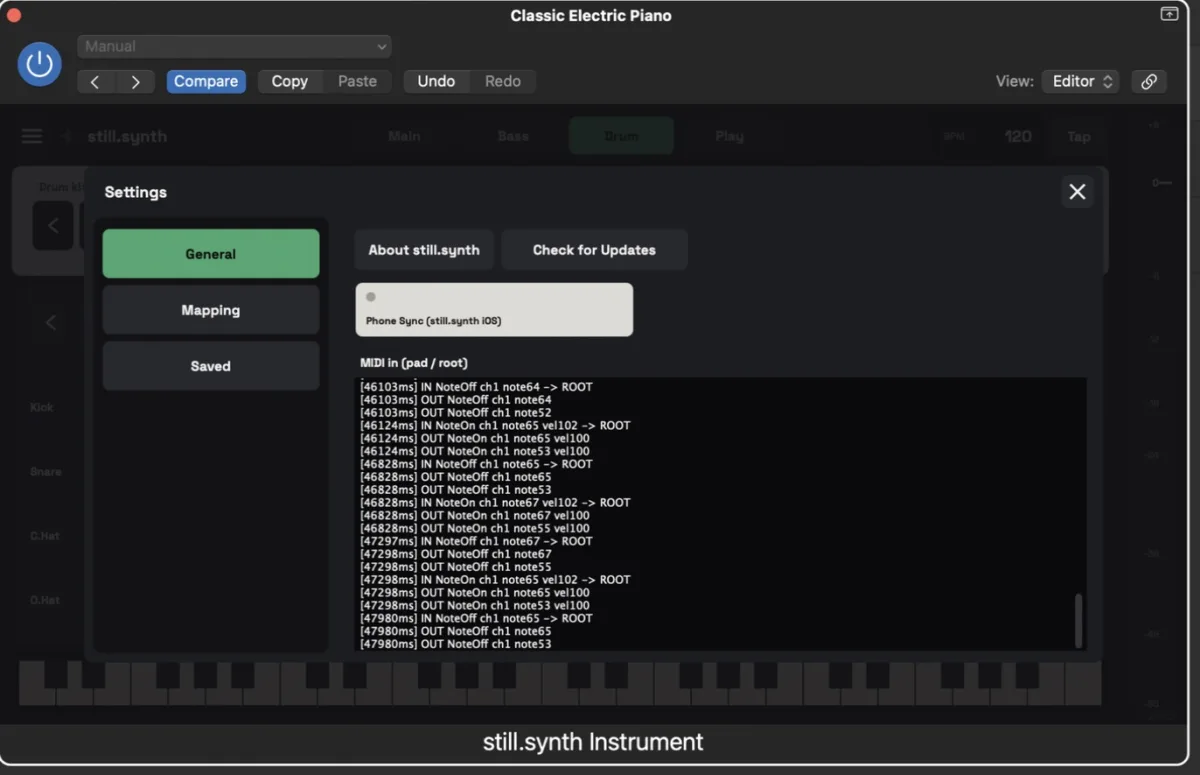
still.synth has two rows of pads. The top row is shapes — Dim, Maj, Min, Sus, 6, m7, M7, 9. The bottom row is roots: the degrees of your key, so every root is always in key.
- Shape + root = a full chord. Hold a shape and press a root.
- Root on its own = the root as an octave.
- With the Melody layer on, a root on its own plays just that single note — for playing a line on top.
- With Bass solo on (Bass tab), roots play only the bass.
From a MIDI keyboard: the keybed plays roots, and the shape pads listen to MIDI notes 96–103 by default — or to your controller’s own pads after Learn Pad (see MIDI controllers below). With no controller, use the computer keyboard: hold 1–8 for a shape and play roots on D F G H J K L ; (; is the tonic an octave up). Each pad shows its key in the corner. The keys work while the still.synth window is in focus. The mouse presses one pad at a time, so it can’t hold a chord.
Layers
The switches at the top of the Play tab turn parts on and off while you play:
- Rich — a fuller voicing: the root an octave up and the top note an octave down.
- Bass — a bass note under every chord, on its own register.
- Drums — the drum engine, in the same tempo.
- Smart — voice leading: each new chord picks the inversion that moves the fewest notes. Off, every chord plays in root position, the same way every time.
- Melody — a root on its own plays a single note instead of an octave.
Voicing
Inv − / Inv + nudges the inversion of the chord you’re holding; it resets when the chord is released, so it never sticks by accident. Oct − / Oct + moves the on-screen keys and the computer keyboard up or down an octave. A MIDI keyboard always plays the notes you press.
Main tab
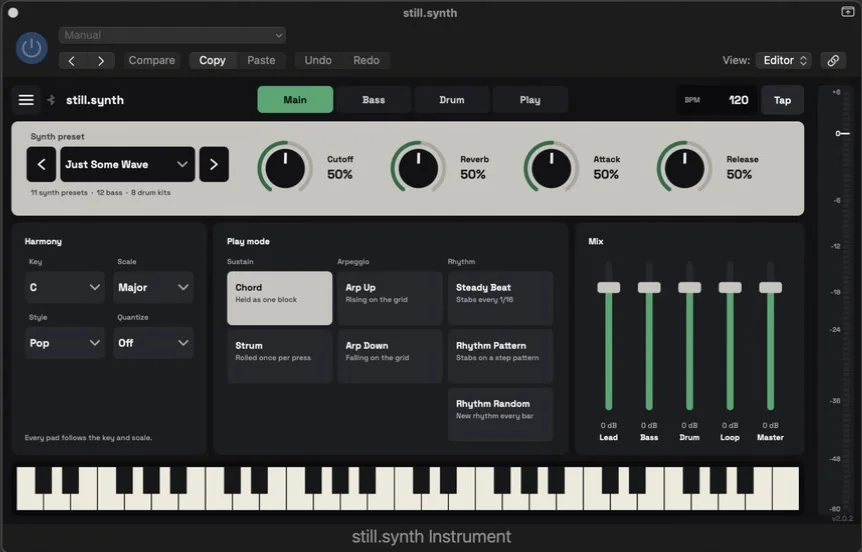
- Synth preset — 11 sounds, plus Cutoff, Reverb, Attack, Release.
- Harmony — Key, Scale (Major, Minor, Dorian, Phrygian, Lydian, Mixolydian, Locrian, Harmonic Minor), Style (Pop, Rock, Synth, Jazz — picks a matching default drum pattern) and Quantize (Off, 1/16, 1/8, 1/4): while something is sounding, a chord change waits for that grid line. The first chord from silence always plays at once.
- Play mode — how a chord plays back: Chord (held as one block), Strum, Arp Up, Arp Down, Steady Beat (stabs every 1/16), Rhythm Pattern, Rhythm Random (a new rhythm every bar).
- Mix — faders for Lead, Bass, Drum, Loop and Master. With everything at 0 dB the parts are already balanced.
Bass tab
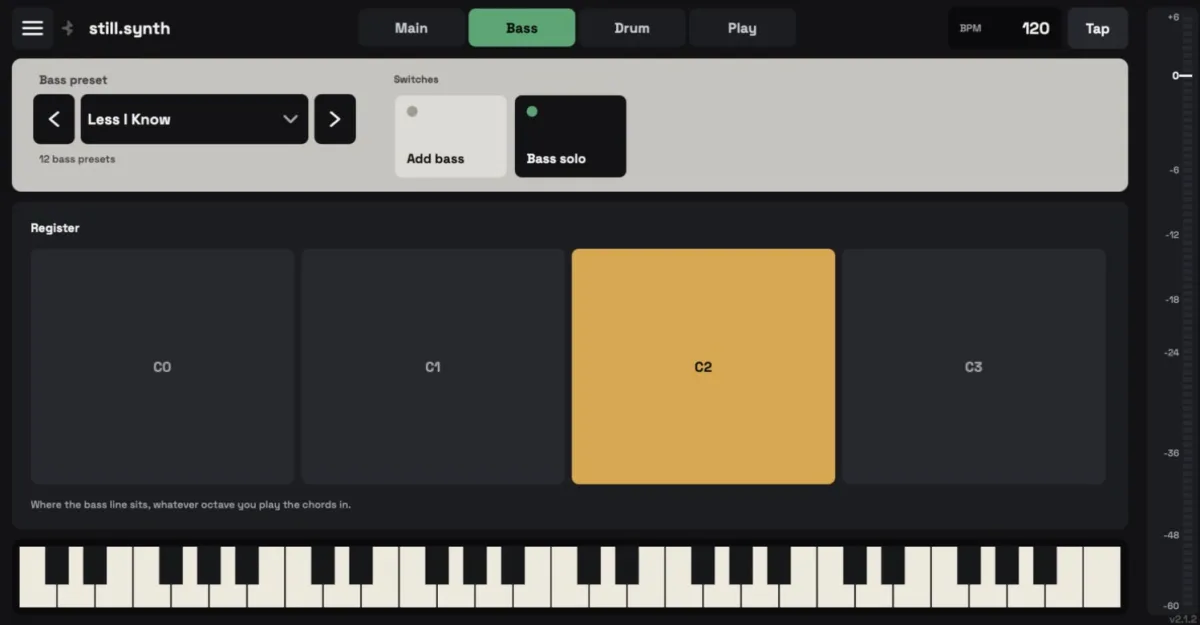
- Bass preset — 12 bass sounds.
- Add bass — the bassline under your chords (the same switch as the Bass layer on the Play tab).
- Bass solo — the roots play only the bass, for playing a bassline by hand. The bass plays the exact note you press, so on the on-screen keys use Oct − to go low.
- Register — C0, C1, C2 or C3 (scientific octaves): where the automatic bass (Add bass) sits, whatever octave you play the chords in.
Drum tab: kits, patterns and your own grooves
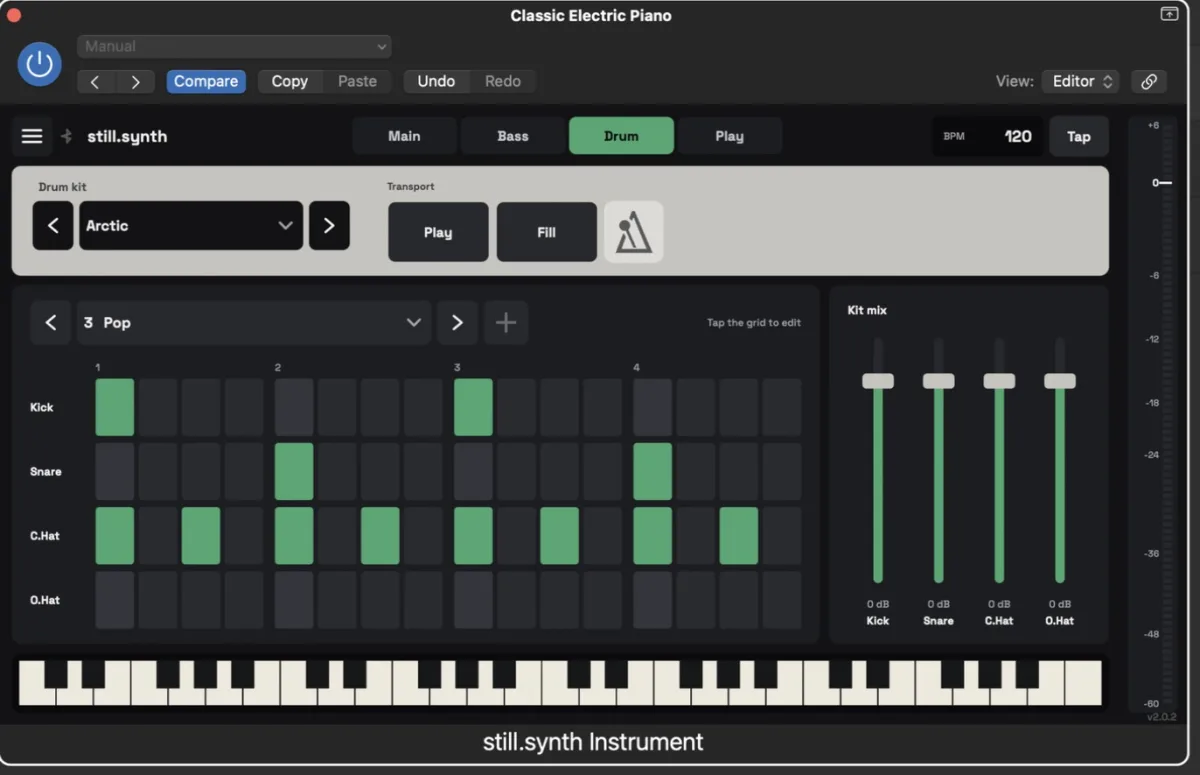
- 8 kits with their own kit mix — separate faders for Kick, Snare, Closed hat and Open hat.
- Play starts the drums (the same switch as the Drums layer), Fill plays a fill that lands on the next downbeat, and the metronome icon turns on a click.
- 10 patterns: Four on the floor, Rock, Pop, Half-time, Disco, Funk, Lo-fi, Pushed, Breakbeat, One drop. Pick one with the arrows or the list; a new pattern starts on the next bar.
- Edit the grid — tap any step to change it. The pattern turns into “Custom · not saved”; press + to save it under a name. On a saved pattern of your own the button turns into −, which deletes it after you confirm.
- Saved patterns are shared by every project; the grid you’re editing is saved with the project itself. Whatever the drums play — your own patterns included — lands on the Drums track when you export MIDI.
Tempo
In a DAW, still.synth follows the host’s tempo and transport. In the Standalone app you set BPM yourself or Tap it in. The metronome icon on the Drum tab turns on a click.
Looper
Build a part layer by layer, up to 32 layers. Every recording snaps to the bar.
- ● Record — red when idle, green while recording; press again to close the layer.
- ↶ Undo — removes the last layer.
- ■ Reset — clears every layer at once (no confirmation).
Recording a take and getting it into your DAW
The ↓ key next to the looper records a take of everything you hear. It starts right away — or on the next turn of the loop if the looper is playing — and stops on the nearest bar. While it records, the two lanes at the bottom of the Play tab fill in live:
- WAV — the whole mix in one stereo file, exactly as you heard it. The waveform shows what got recorded.
- MIDI — one file with a track per instrument: Drums, Main: <synth preset>, Bass: <bass preset>, plus the tempo.
Drag a lane straight onto your DAW: the WAV becomes an audio region, the MIDI lays every instrument out on its own track, ready for your own sounds and mixing.
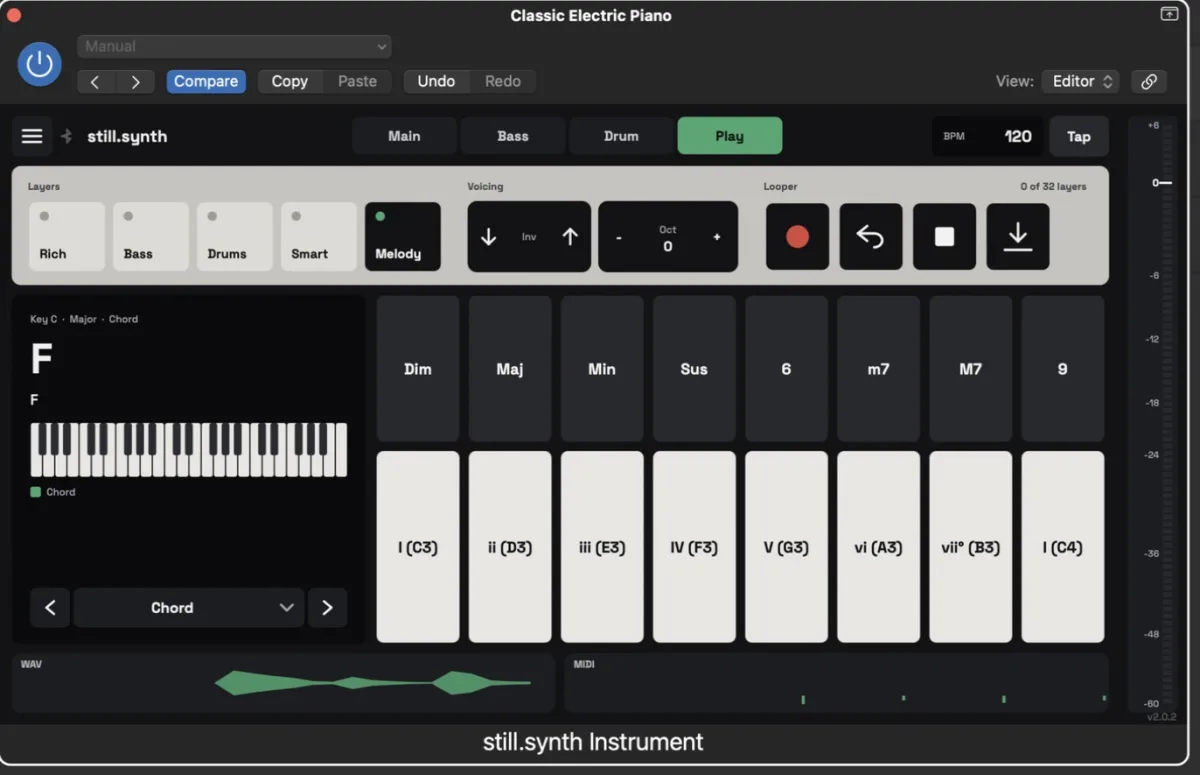
Every take is also kept in Settings (☰) → Saved, where you can play it back (▶), save or share its wav and midi, or delete it. The files live in ~/Library/still.synth/Saved on a Mac and %APPDATA%\still.synth\Saved on Windows.
MIDI controllers
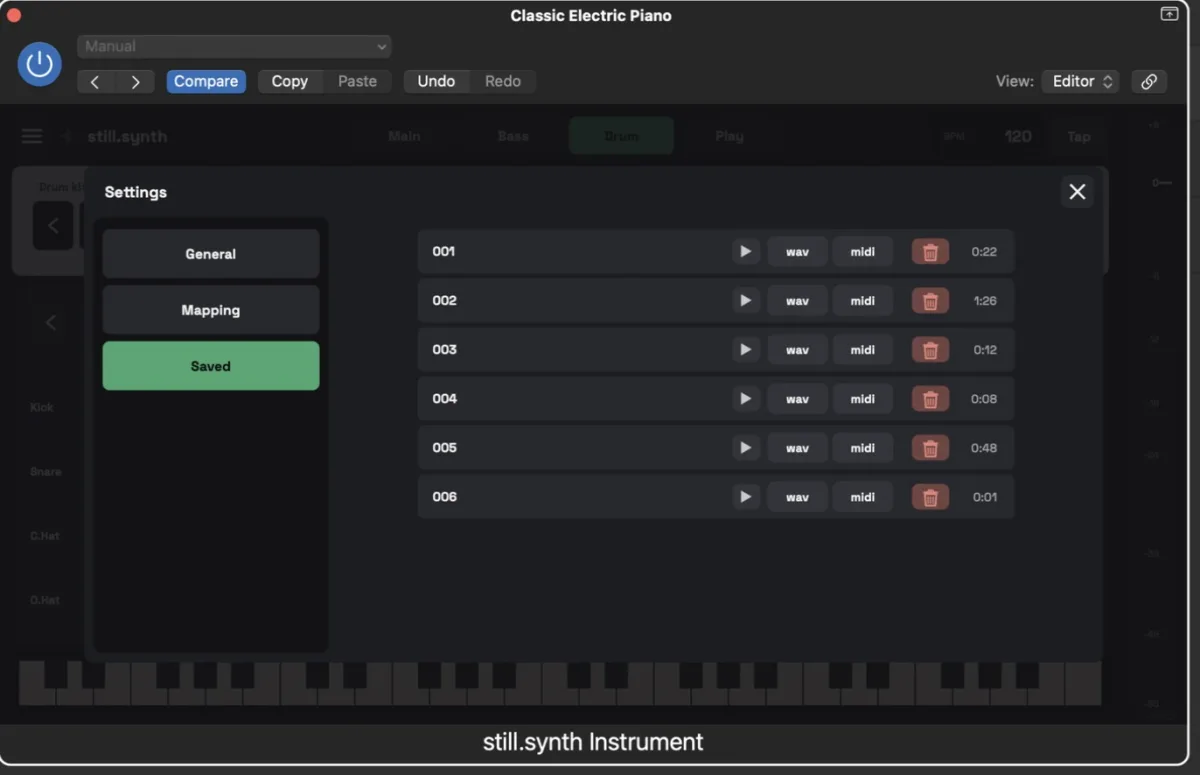
Roots come from your keybed. The shape pads are set up at the top of Settings (☰) → Mapping:
- Learn Pad — press it, then hit your first pad; the eight shapes follow from there.
- Pad Base — the note of the first shape pad, if you’d rather set it by hand (default C6, note 96).
- Pad Ch — the channel your pads send on (default 10). Only notes on that channel count as shapes, so pads and keybed can share note numbers on different channels.
Below that, every control can go on your hardware. Press Learn on a row, then move a knob, fader or button; × clears it. Some come pre-mapped — Cutoff on CC 74, Reverb on CC 71, Attack on CC 76, Release on CC 77:
- 16 buttons — Rich, Bass, Drums Play, Smart Voicing, Melody, Bass Solo, Drum Fill, Looper Record, Looper Undo, Looper Reset, Metronome, Tap Tempo, Inv −, Inv +, Oct −, Oct +. A button can be a note, a CC, or a Combo of two notes held together.
- 12 knobs and faders — Cutoff, Reverb, Attack, Release, Lead / Bass / Drum / Loop / Master volume, Play Mode, Bass Register, Drum Pattern.
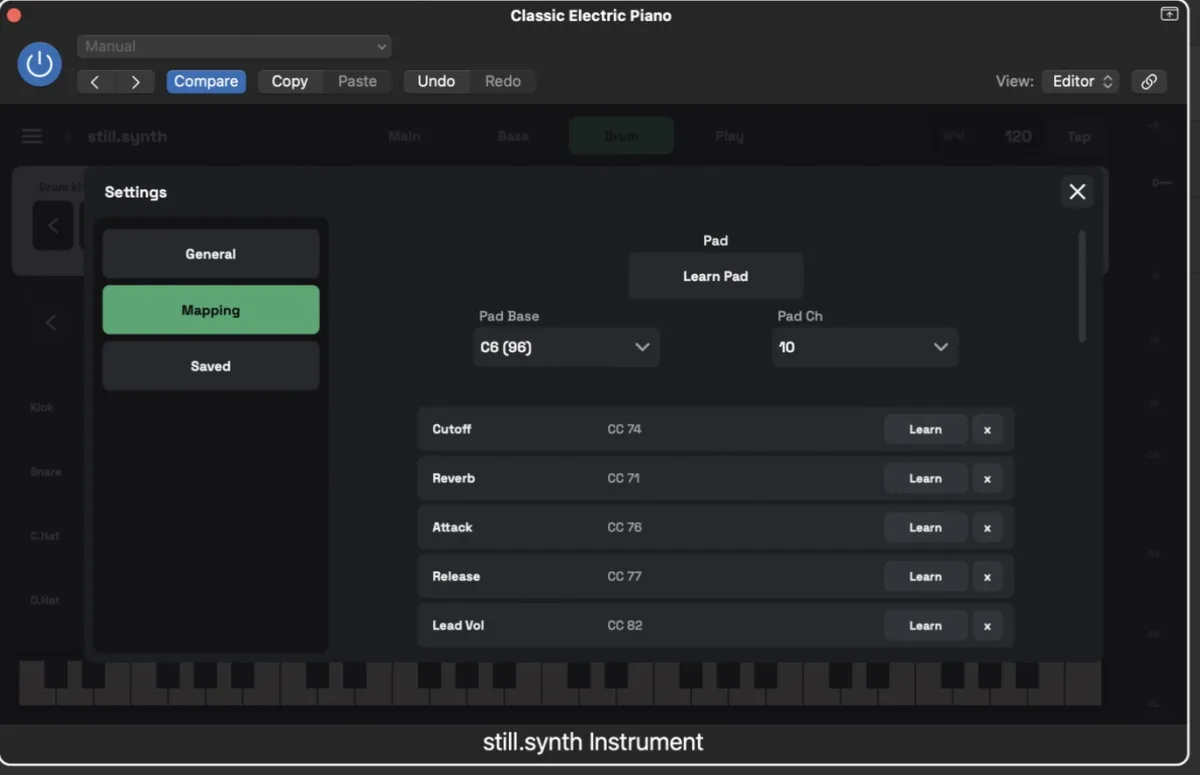
Is your controller getting through? The small icon next to ☰ lights up while MIDI is arriving, and Settings → General shows every incoming note live under MIDI in (pad / root).
Bluetooth MIDI controllers
A Bluetooth controller works like any other MIDI input once your computer has paired it. On a Mac: open Audio MIDI Setup, choose Window → Show MIDI Studio, click the Bluetooth button and connect the controller. Then enable it as an input in your DAW (or in the Standalone app’s audio/MIDI settings) and watch for the activity light next to ☰. On Windows, use your controller’s own Bluetooth MIDI driver or utility.
Updates and your license
One license runs on three computers. still.synth checks for new versions on its own; you can also press Check for Updates in Settings → General. Updates are free.
Play it before you buy it
The home page has a live version of the chord pads — tap a shape and a root and listen.